Switching DNS Servers For Speed & Security
DNS servers are one of those features most internet users don’t pay much attention to (if they even know they exist). Your ISP quietly provides this service in the background and most folks think nothing more of it. But in many cases, you aren’t required to use the default DNS, and in some cases, there are compelling reason not to use the default one. Think about email; a few decades ago nearly everyone used the email service provided by their ISP but other email providers eventually provided more and more compelling reasons not to do so.

What Exactly is a DNS Server?
Beneath the (normally) human-friendly visible layer of the internet lays the machine-readable expanse of IP addresses. In principle, every computer on the internet has its own unique IP. You may have seen these occasionally in your browser’s address bar or if you’ve every had to configure the more esoteric aspects of your router. The DNS server is a kind of “phone book” that translates “looks up” those human-friendly names and matches them to their IP addresses.
Why Would You Want to Change?
Now imagine that some phone books are better organized, more comprehensive, or block bad businesses. What is someone watched all the times you looked up a number and used it to form a profile about you, or even add their own message into your lookup.
Public and/or Free DNS Servers
You have lots of options. Features vary and some may be better suited to some users than others. Below is a short list of a couple I like.
| Provider | Address | Notes |
| 8.8.8.8 8.8.4.4 | Good privacy, transparency | |
| OpenDNS | 208.67.222.222 208.67.220.220 | Phishing blocker, web filtering (optional) |
| CloudFlare | 1.1.1.1 1.0.0.1 | Fast, stable, good privacy |
| Quad9 | 9.9.9.9 or 9.9.9.10 | Fast, malicious site blocking, unfiltered option |
Need More Options?: Additional Free and/or Public DNS Servers
How to Change Your DNS Server?
The following instructions are for personal computers. Your exact menus may vary depending on your operating system.
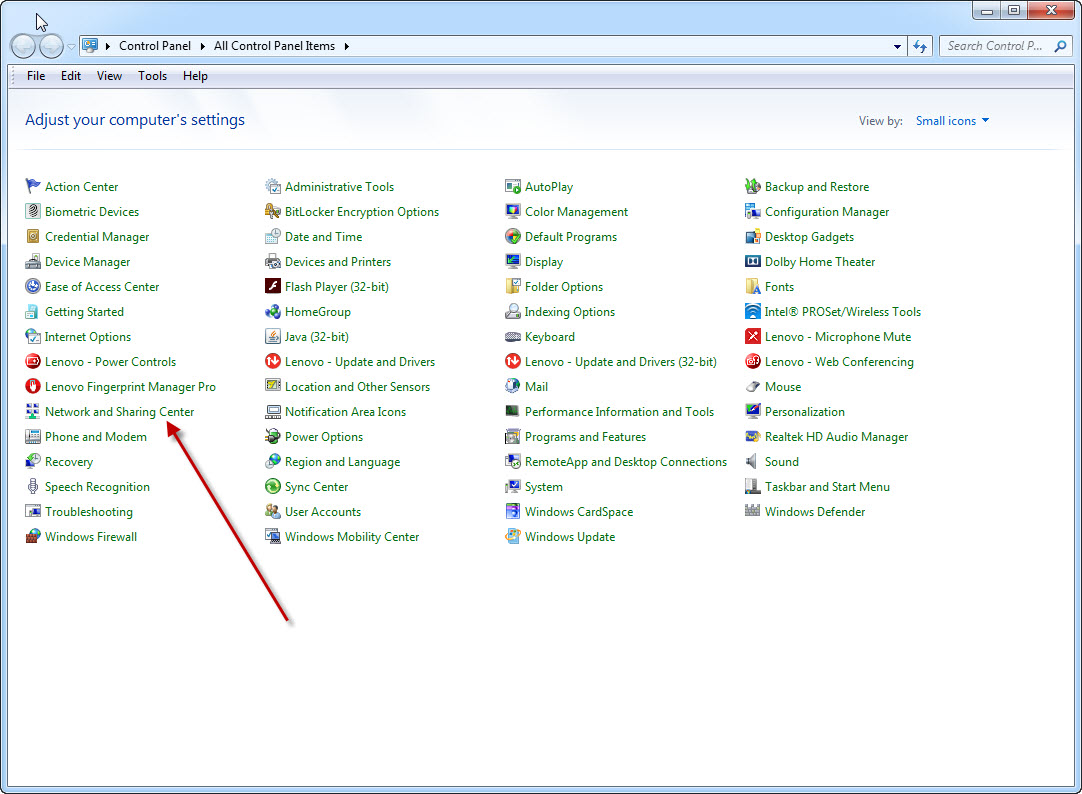
1. Open up your Windows search/command box, type control panel and press enter to launch the Control Panel app.

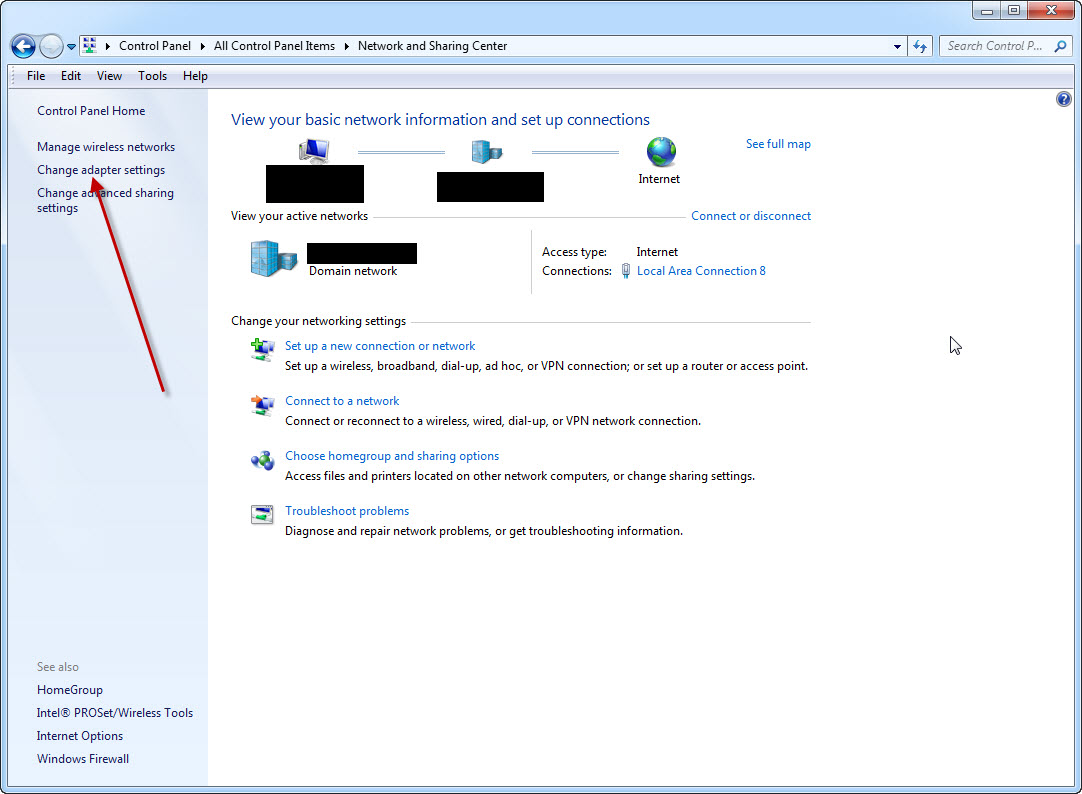
2. Click on Network and Sharing Center to view your active network
3. Click Change adapter settings to open the Network Connections window
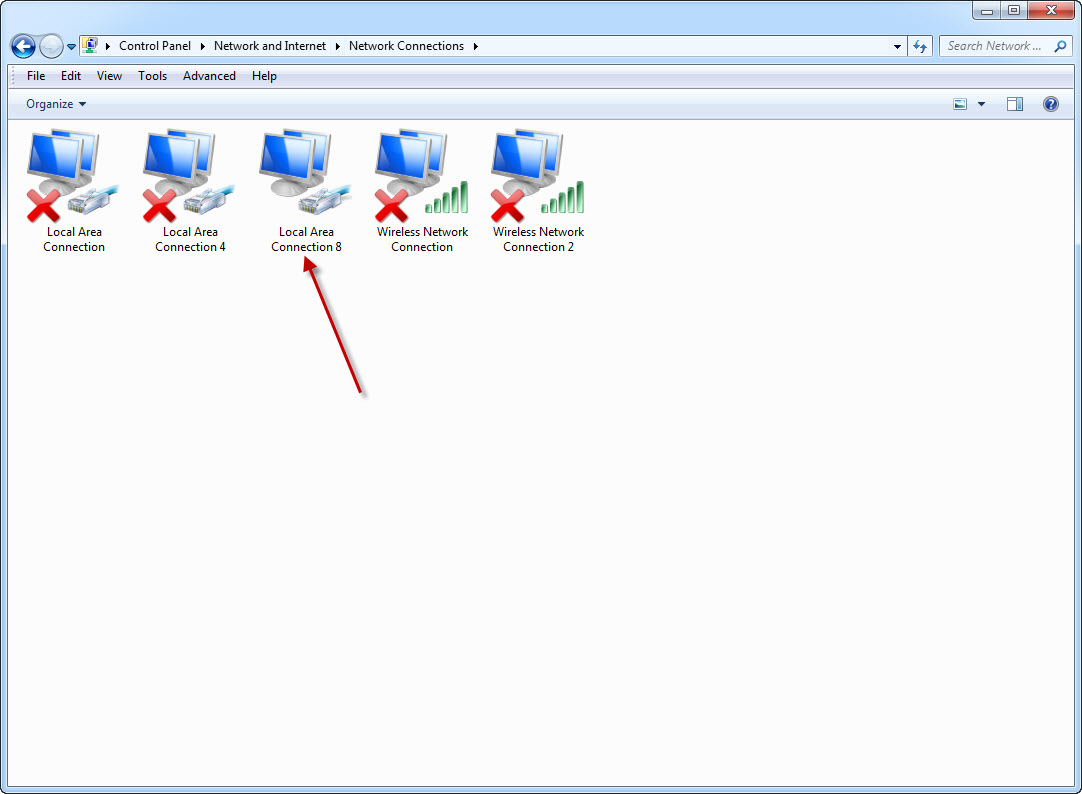
4. Right-click on your network (ones you aren’t currently using should have an X on them) and select Properties.
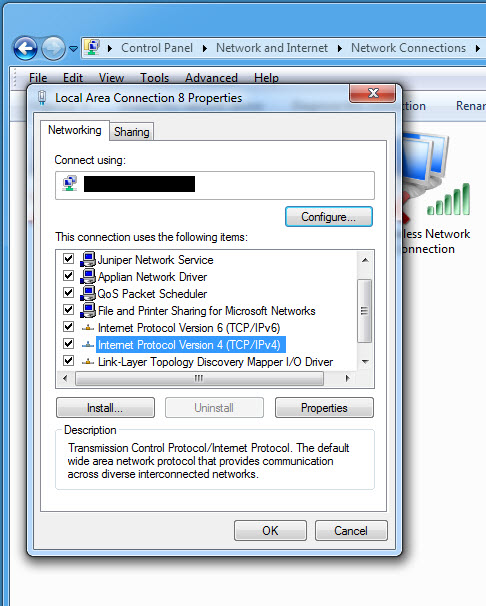
5. In the This connection uses the following items area click on Internet Protocol Version 4 (TCP/IPv4) and then click the Properties button.
6. In the window that opens, typically Obtain DNS server address automatically is selected. Click the radio button below it labeled Use the following DNS server addresses
7. The Preferred DNS server box should un-gray. Enter your new four-digit number for the DNS Server you chose in the Public and/or Free DNS Servers section of this article.
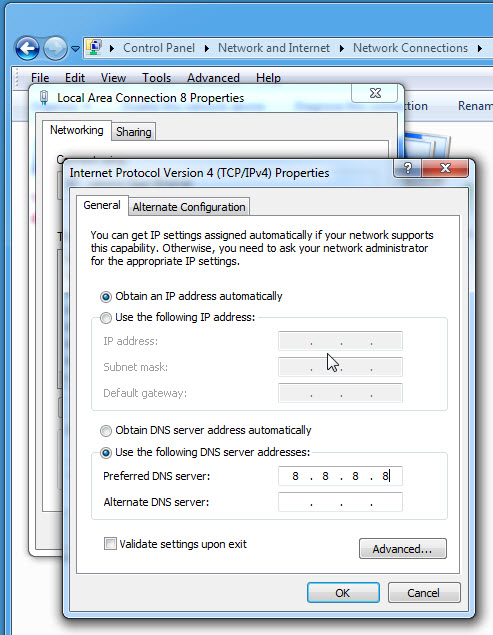
8. Click apply/ok/accept all the way out of this series of windows.
Test your connect by launching your browser and visiting web sites. If you are using a DNS services that blocks sites intentionally (security, adult, etc) you should see those effects as well. If not, you may need to clear browser cache, restart your browser or reboot.
Reverting Back: Following steps 1-7 above and click on the radio button next to Obtain DNS server address automatically
Hello Is This Thing On?: Test your new DNS server performance with a free benchmarking tool.